
Adapting your home is not just about buying equipment; it’s a strategic process of navigating council grants and understanding the real costs and risks *before* a crisis hits.
- A Disabled Facilities Grant (DFG) can cover the full cost, but success depends on how you present your case; phrases like ‘bed-blocking prevention’ are critical.
- The huge price gap between straight (£2,900+) and curved (£12,000+) stairlifts is due to the non-reusable, custom-engineered rail required for any turn or bend.
Recommendation: Begin by documenting the ‘warning signs’—like planning your day around stair use or ‘bottom-shuffling’—as this evidence is crucial for a successful and timely DFG application.
That one step up to the front door. The flight of stairs to the bedroom. For years, they were insignificant. Now, they dictate your life, shrinking your world to a single floor and turning your own home into a map of no-go zones. It’s a deeply frustrating experience shared by thousands of seniors and their families across the UK. The common advice is often reactive and drastic: move the bedroom downstairs, consider residential care, or simply ‘be more careful’. These are not solutions; they are compromises that chip away at independence and dignity.
But what if the problem isn’t the physical barrier itself, but a lack of strategic knowledge? The key to reclaiming your entire home isn’t just about choosing a piece of equipment. It’s about understanding the system of grants, the hidden engineering costs, and the critical decision points that come long before a salesperson visits. It’s about knowing how to make your case to the council, why a ‘simple’ ramp can be a dangerous failure, and when to act to prevent a minor difficulty from becoming a major crisis.
This guide moves beyond the sales brochures to give you the insights of an access consultant. We will break down the exact process for securing council funding, explain the real-world physics and finances behind mobility solutions, and identify the crucial triggers for taking action. By the end, you won’t just be looking at equipment; you’ll have a clear strategy for preserving independence and keeping your home a sanctuary, not a prison.
This article will provide a structured path through these complex decisions. Below is a summary of the key areas we will explore, guiding you from understanding financial support to making the right equipment choices for your specific needs.
Summary : Your Strategic Guide to Reclaiming Every Floor of Your Home
- How to Apply for a Disabled Facilities Grant to Get a Free Stairlift Through Your Council?
- How to Get a Council-Funded Stairlift Without Waiting 18 Months?
- When Should You Install a Stairlift to Keep Using Your Entire Home vs Moving Bedroom Downstairs?
- Straight Stairlift vs Curved Stairlift: Why Does One Cost £5,000 More Than the Other?
- Wooden Ramp vs Threshold Ramp vs Vertical Platform Lift: Which Works for a 3-Step Entrance?
- The Too-Steep Ramp That Causes Wheelchair Rollbacks in the Rain
- Why Does a Rollator Get You Out of the House When a Frame Keeps You Indoors?
- Why Do 70% of Rollator Users Never Adjust the Handle Height After Purchase?
How to Apply for a Disabled Facilities Grant to Get a Free Stairlift Through Your Council?
The Disabled Facilities Grant (DFG) is the cornerstone of funding for home adaptations in the UK. It’s a means-tested, council-administered grant designed to help disabled people live more independently. Crucially, this isn’t a loan; it doesn’t have to be repaid and can cover the full cost of major works, including a stairlift. The maximum grant amounts vary by region; according to official government guidance, it’s up to £30,000 in England, £36,000 in Wales, and £25,000 in Northern Ireland. For children and individuals on certain benefits, the means test may not apply, making the grant effectively guaranteed if the need is proven.
The application process starts by contacting your local council’s housing or environmental health department. They will typically arrange for an Occupational Therapist (OT) to visit your home. This assessment is the most critical part of the process. The OT’s role is to evaluate your needs and recommend the most appropriate solution. It is their report that formally justifies the necessity of the adaptation to the council. You are not just asking for a stairlift; the OT is professionally recommending it as an essential medical and social need.
To prepare for this, you must gather a portfolio of evidence. This includes proof of income, details of property ownership or a landlord’s permission letter, and at least two quotes from stairlift suppliers. A key component is a letter from your GP confirming your mobility limitations. The council will also conduct a financial assessment, but it’s important to know that savings under £6,000 are typically disregarded. If the council grant is insufficient or denied, don’t despair. As highlighted by specialist charities such as SSAFA for veterans or sector-specific organisations, a network of alternative funding exists that an OT or social worker can help you access.
Your action plan for a successful DFG application
- Contact your council: Initiate the process by requesting an OT assessment for a Disabled Facilities Grant.
- Gather financial documents: Collect proof of all income, benefits, and savings. Note that savings under £6,000 are usually ignored.
- Secure medical evidence: Obtain a letter from your GP detailing your mobility issues and the medical necessity for the adaptation.
- Obtain multiple quotes: Get at least two written quotes from reputable stairlift contractors to submit with your application.
- Assemble property details: Prepare your property deeds or a formal letter of permission from your landlord if you are a tenant.
Approaching the DFG application as a formal project with all necessary documentation prepared in advance demonstrates seriousness and can significantly streamline the council’s decision-making process.
How to Get a Council-Funded Stairlift Without Waiting 18 Months?
The standard waiting time for a DFG assessment and installation can be frustratingly long, often stretching over a year. However, there are specific circumstances and key phrases that can act as « bureaucratic leverage » to fast-track your application. The system is designed to respond to urgency, and your task is to clearly articulate why your case is urgent. The most powerful trigger is an imminent hospital discharge. Using the phrase ‘bed-blocking prevention’ with the hospital discharge team and the council is extremely effective. Hospitals are under immense pressure to free up beds, and councils prioritise cases that will prevent a delayed discharge or a costly re-admission.
Another powerful accelerator is demonstrating a high risk of admission to institutional care. If you can show that the lack of a stairlift is the primary barrier preventing you from living at home, the council has a strong financial incentive to act. The cost of a stairlift is a fraction of the cost of residential care, a bill they would ultimately have to bear. Evidence of a recent serious fall requiring medical treatment also adds significant weight and urgency to your application, as does a documented risk of carer breakdown, where the primary caregiver can no longer safely assist with the stairs.
To build an undeniable case, you need more than just a GP’s note. The « Multi-Professional Support Letter Strategy » is a powerful tactic. As explained by housing experts at charities like Age UK, a coordinated set of letters creates a compelling narrative. This means supplementing the OT’s report with documentation from District Nurses (confirming daily safety risks), specialist consultants like geriatricians (diagnosing progressive conditions), and social workers (assessing the risk of institutionalisation). Each letter should explicitly name the stairlift as the essential intervention required to maintain independent living.
Finally, situations involving palliative care or end-of-life needs are, quite rightly, given the highest priority. Clearly communicating these circumstances ensures that the application is moved to the top of the list for immediate assessment and action. It’s about providing the council with the necessary justification to bypass the standard queue.
When Should You Install a Stairlift to Keep Using Your Entire Home vs Moving Bedroom Downstairs?
The decision to install a stairlift is often delayed until a crisis, but the right time to act is much earlier. It’s not a single event, but a series of subtle changes in behaviour—the « warning signs »—that signal a critical decision point is approaching. Ignoring these signs means you are adapting your life to the disability, rather than adapting your home to your needs. The most telling sign is ‘bottom-shuffling’: when you start sitting on the stairs to go up or down because walking them feels unsafe. This is a clear indicator that your current method is unsustainable and dangerous.
Other crucial warning signs involve conscious planning and fear. Are you organising your entire day to minimise trips upstairs, perhaps leaving things you need on another floor? Have you developed makeshift carrying methods, like a bag slung around your neck, to get items up and down? This activity planning is a subconscious admission that the stairs are a significant obstacle. A tangible new anxiety or hesitation before using the stairs, especially after a near-miss or stumble, is another major red flag. This fear is a protective instinct, and it should be listened to.
Pay attention to physical dependency. If you now need to use both handrails, or lean heavily on the wall for support, where one rail was previously sufficient, your strength and balance have demonstrably changed. Similarly, if you find yourself needing to stop and rest at the top or bottom to catch your breath or let your legs recover, the physical toll is becoming too great. These are not signs of ‘getting old’; they are specific, measurable indicators of declining function that increase your risk of a fall.
The context for this decision is stark. According to CDC data, more than 1 out of 4 older adults falls each year, and falling once doubles the chance of it happening again. A stairlift is not an admission of defeat; it is a proactive tool to eliminate the single most common location for a serious fall in the home. Moving a bedroom downstairs is a major upheaval that permanently reduces the size of your home and may not be practical. Installing a stairlift when the first warning signs appear is a strategic decision to preserve your access to your entire home, safely and for the long term.
Straight Stairlift vs Curved Stairlift: Why Does One Cost £5,000 More Than the Other?
The most shocking discovery for many families is the colossal price difference between a straight and a curved stairlift. A straight stairlift can be installed for between £2,000 and £5,000, while a curved model starts at £9,000 and can easily exceed £15,000. This isn’t arbitrary pricing; it’s a direct result of the fundamental difference between mass production and bespoke engineering. The « cost of customisation » is where the extra thousands are spent.
A straight stairlift is an off-the-rack product. The rail is a simple, extruded piece of aluminium, manufactured in standard lengths and cut to size on-site. The chair and motor are standardised components that fit any straight rail. Installation is quick, typically taking only 3-4 hours. Because the parts are generic, there is a small potential for resale or for the unit to be refurbished and used elsewhere.
A curved stairlift, by contrast, is a one-off, custom-made piece of precision engineering. The moment a staircase has a turn, a landing, or a bend, a standard rail is useless. The process begins with a technician using 3D laser scanning or a complex photo-surveying system to create a precise digital model of your unique staircase. This data is then sent to a factory where a CAD (Computer-Aided Design) model is created. The rail is then fabricated specifically for your home, with every bend and change in gradient perfectly matched. This bespoke manufacturing process is labour-intensive and requires specialised machinery.
This is why industry pricing data reveals such a stark contrast. The installation of a curved stairlift is also more invasive, often taking a full day. Most importantly, a curved stairlift rail has zero resale value. It was built for one staircase in the world—yours. If you move or no longer need it, the entire bespoke rail has to be scrapped. The higher cost, therefore, reflects not just the complexity of the product, but the fact that it is a single-use, non-transferable solution tailored to the unique geometry of your home.
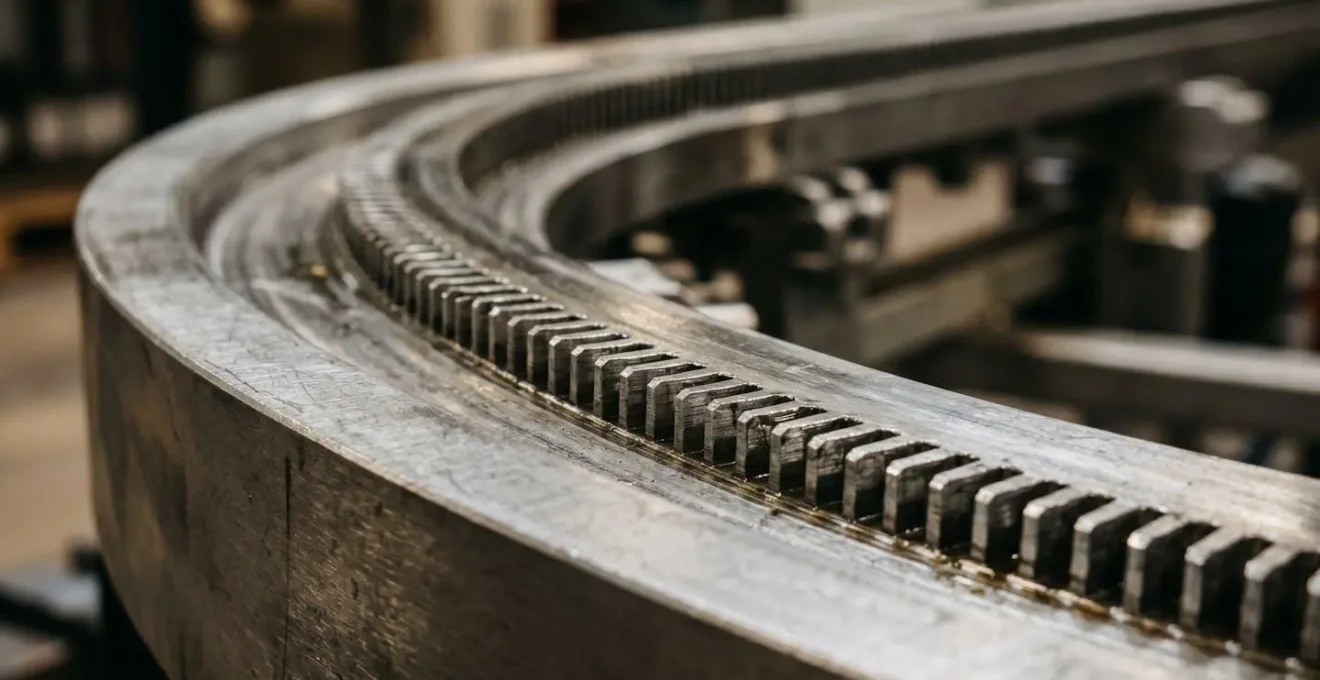
The intricate engineering required for a curved rail, as seen in the custom bends and gear system, is the primary driver behind the significant cost increase compared to a simple, straight track.
Wooden Ramp vs Threshold Ramp vs Vertical Platform Lift: Which Works for a 3-Step Entrance?
Tackling a three-step entrance is a more complex challenge than it appears. The choice of solution depends entirely on the available space, budget, and the user’s long-term needs. A simple threshold ramp is immediately out of the question; these are designed only for single steps or doorway thresholds, typically up to 6 inches in height. For a three-step rise (approximately 21-24 inches), you are primarily choosing between a long, fixed ramp or a compact, mechanical lift.
A wooden or modular ramp is the most common solution, but its primary constraint is space. To be safe and usable for a wheelchair user, a ramp must comply with accessibility guidelines. The standard, as specified by regulations like the ADA, dictates a 1:12 maximum slope, meaning 1 inch of rise for every 12 inches of length. For a 24-inch rise, this translates to a 24-foot long ramp run. Furthermore, you need a flat, 5ft x 5ft landing at both the top and bottom for manoeuvring. The total footprint is enormous, and this permanent structure may require planning permission from your council. While cheaper in terms of materials, it consumes a vast amount of garden or driveway space.
The alternative is a Vertical Platform Lift (VPL), often called a porch lift. This is essentially a small, open-air elevator. Its key advantage is its compact footprint, typically requiring a space of only about 4ft x 5ft. The user rolls onto the platform, presses a button, and is lifted vertically to the level of the doorway. While the initial cost is higher than a wooden ramp, a VPL offers significant advantages. It requires no physical exertion from the user or a carer, it works for both wheelchair and rollator users, and it adapts to declining strength. A VPL will almost certainly require planning permission and a dedicated electrical supply, but it is often the only viable solution for properties with limited external space.
Therefore, the decision is a trade-off. If you have a very long, straight approach to your door and a limited budget, a modular ramp might work. However, for most typical UK properties, a VPL is the more practical, safer, and future-proof solution for overcoming a multi-step entrance, despite the higher initial investment.
The Too-Steep Ramp That Causes Wheelchair Rollbacks in the Rain
A poorly designed or installed ramp is more dangerous than no ramp at all. The most common and hazardous failure is the « too-steep » ramp, often installed by well-meaning but unqualified builders to save space. Anything steeper than the 1:12 gradient creates a significant risk of a wheelchair user rolling backwards, especially if they are self-propelling. This risk is amplified tenfold in wet or icy conditions, which is a critical consideration in the UK climate.
The surface material of the ramp is a crucial factor in preventing this « physics of failure ». A ramp with a smooth, painted wooden surface is a death trap in the rain, becoming as slippery as ice. While gritted or sandpaper-like surfaces provide good initial grip, they can wear down quickly with use and weather exposure. The gold standard for outdoor ramps is an expanded metal mesh surface. This material allows water, snow, and ice to fall through rather than accumulating on the surface, ensuring a consistent grip in all weather conditions. Securely installed rubber matting can also be effective, but the key is that the surface must actively manage moisture.
Another hidden danger is the cross slope of the ramp. This is the side-to-side angle of the ramp surface. While the main slope might be correct, if the ramp tilts to one side, it will constantly try to steer a wheelchair towards the edge. The ADA requirements specify a 2% maximum (a 1:50 ratio) cross slope to prevent this. A ramp that appears level to the naked eye can have a dangerous cross slope, posing a tipping risk for wheelchair users and making it difficult for people with walkers to maintain a straight line.
Before installing any ramp, it must be audited for these two key factors: is the main gradient 1:12 or less, and is the surface material suitable for all-weather grip? A ramp is a piece of safety engineering, not just a simple incline. Sacrificing gradient to save space or using an inappropriate surface material to save cost introduces unacceptable risks. A safe, compliant ramp may be long, but a short, steep, slippery one is a guaranteed accident waiting to happen.
Key Takeaways
- A Disabled Facilities Grant (DFG) is the primary funding source for home adaptations, but a successful application requires strategic preparation and evidence.
- The vast cost difference between straight and curved stairlifts is not about features, but the bespoke, single-use engineering required for any staircase with a bend.
- The decision to install a mobility aid should be made proactively based on early ‘warning signs,’ not reactively after a fall or crisis.
Why Does a Rollator Get You Out of the House When a Frame Keeps You Indoors?
For many, the choice between a walking frame and a rollator seems minor, but it can be the difference between a house-bound existence and neighbourhood activity. The reason lies in the hidden physics of walking and the concept of the « Energy Deficit Cycle ». A standard walking frame, which must be lifted and placed for every step, forces an unnatural, stop-start, stooped gait. This pattern is incredibly energy-intensive. The user expends a huge amount of effort just to move a short distance, leading to rapid exhaustion.
This creates a vicious cycle. The exhausting nature of walking with a frame discourages the user from going outside. This reduced activity leads to muscle wastage and a decline in cardiovascular fitness. As the user becomes weaker, walking with the frame becomes even more tiring, further reinforcing their reluctance to leave the home. The world shrinks to what is manageable within those four walls.
A rollator breaks this cycle completely. As described in studies on mobility aids, its wheeled design promotes a fluid, upright, and continuous walking pattern that more closely mimics a natural gait. The user is not lifting the device, but gently pushing it, which conserves a vast amount of energy over any given distance. This « energy economy » is transformative. A walk to the local shop, unthinkable with a frame, becomes achievable with a rollator. This renewed activity helps to maintain muscle strength and stamina, fighting the deconditioning that a frame inadvertently accelerates.
Furthermore, the integrated seat on a rollator acts as a psychological and physical safety net. It turns the device into a ‘mobile basecamp’. The user gains the confidence to venture further from home, knowing they have a guaranteed place to rest whenever they need it. This single feature dramatically expands their accessible world. The frame tethers them to the house; the rollator gives them the confidence and the physical means to re-engage with their community.
Why Do 70% of Rollator Users Never Adjust the Handle Height After Purchase?
A rollator can be a life-changing tool, but only if it’s set up correctly. An astonishing number of users receive their rollator and never adjust the handle height, using it « as is » from the box. This is a critical mistake that negates many of the device’s benefits and can even cause secondary problems like back pain and shoulder strain. The correct height is not a matter of opinion; it’s a precise measurement crucial for posture, safety, and comfort.
The correct handle height is essential for maintaining an upright posture. If the handles are too low, the user is forced to stoop, putting strain on their lower back and wrists. If they are too high, it forces the shoulders to shrug upwards, leading to tension in the neck and shoulders. An incorrectly adjusted rollator can create new aches and pains, discouraging its use altogether.
Fortunately, setting the correct height is simple. The user should stand upright next to the rollator, wearing their normal walking shoes, with their arms hanging relaxed at their sides. As mobility experts recommend, the handle height should be at wrist crease level when standing straight. The handgrip should align perfectly with the crease of the wrist. If the user has to bend their arm up or reach down to hold the grip, the height is wrong. This simple, two-step check ensures that when the user holds the grips, their arms will have a slight, natural bend, and their posture will remain tall and supported.
For individuals with arthritis, the adjustment knobs or buttons can sometimes be too stiff to manage. In this case, it’s vital to ask a family member, carer, or the equipment supplier to make the adjustment. Once the correct height is found, it’s a good idea to mark the setting with a permanent marker or a piece of tape, making it easy to reset if it’s ever changed. Posture can change over time, so it’s wise to re-check the handle height every six months to ensure the rollator continues to provide optimal support. This small, one-time adjustment makes a world of difference in daily use.
Now that you have a comprehensive overview, the next logical step is to apply this knowledge. Begin by evaluating your own home and situation using these expert insights, and start compiling the necessary evidence to build your case for support.